Mastering for Modular
WHAT IS MASTERING?
So. You’ve made that awesome patch, you carefully perform and record it into your daw, and you’re all ready to share it with the world. There’s just one problem: it sounds bad. The music is there, all your carefully crafted sounds are in that audio file, but it’s quiet and doesn’t have the impact of the recordings you’ve compared it to. This is where mastering comes in. In a traditional music release, mastering is basically the final stage of mixing. A mixing engineer would take the stems of a track and shape them to fit together into a song. A mastering engineer then takes the stereo rendering of that mix, and does some voodoo magic to it to make it ready for release (and by voodoo, I mean EQing and dynamics management, for the most part). Mastering has always been treated as a dark art, full of mystery, and requiring skill unattainable by us mere mortals. However, the basic concepts are easy to comprehend, and especially if you just want your Instagram clip or YouTube video to have a bit more punch, it’s not very difficult (or expensive) to do. So where do we start?
ARE YOU MIXING, MASTERING, OR BOTH?
As I said earlier, traditionally, mixing is the act of taking a multitrack recording and making everything sound good together, and mastering is the act of prepping a full track for release. However, the two have started to blur in recent years, and especially in a modular context it doesn’t always make sense to completely separate the two.
If I’m prepping a patch for a proper release, most often I’ll record it as a multitrack and do a full mix on it before I go to the mastering phase of the process. I’m a producer at heart, and this is how I’m used to thinking. However, I also do a lot of mixing in the rack while I’m making a patch. I have dedicated EQ’s, compressors, delays, reverbs, and mixers that allow me to control frequencies, buss groups of sounds through different sound-shaping processes, and do a lot of what I’d normally do in my DAW right in my eurorack system. This means that sometimes I do most of the mixing stage in the rack, record it as a simple stereo track, give it a quick go-over when I’m starting the mastering process, and call it mixed. There’s something very satisfying about leaving as much as I can in the hardware domain as well, and sometimes stuff sounds great coming straight out of the rack so it just makes a lot more sense.
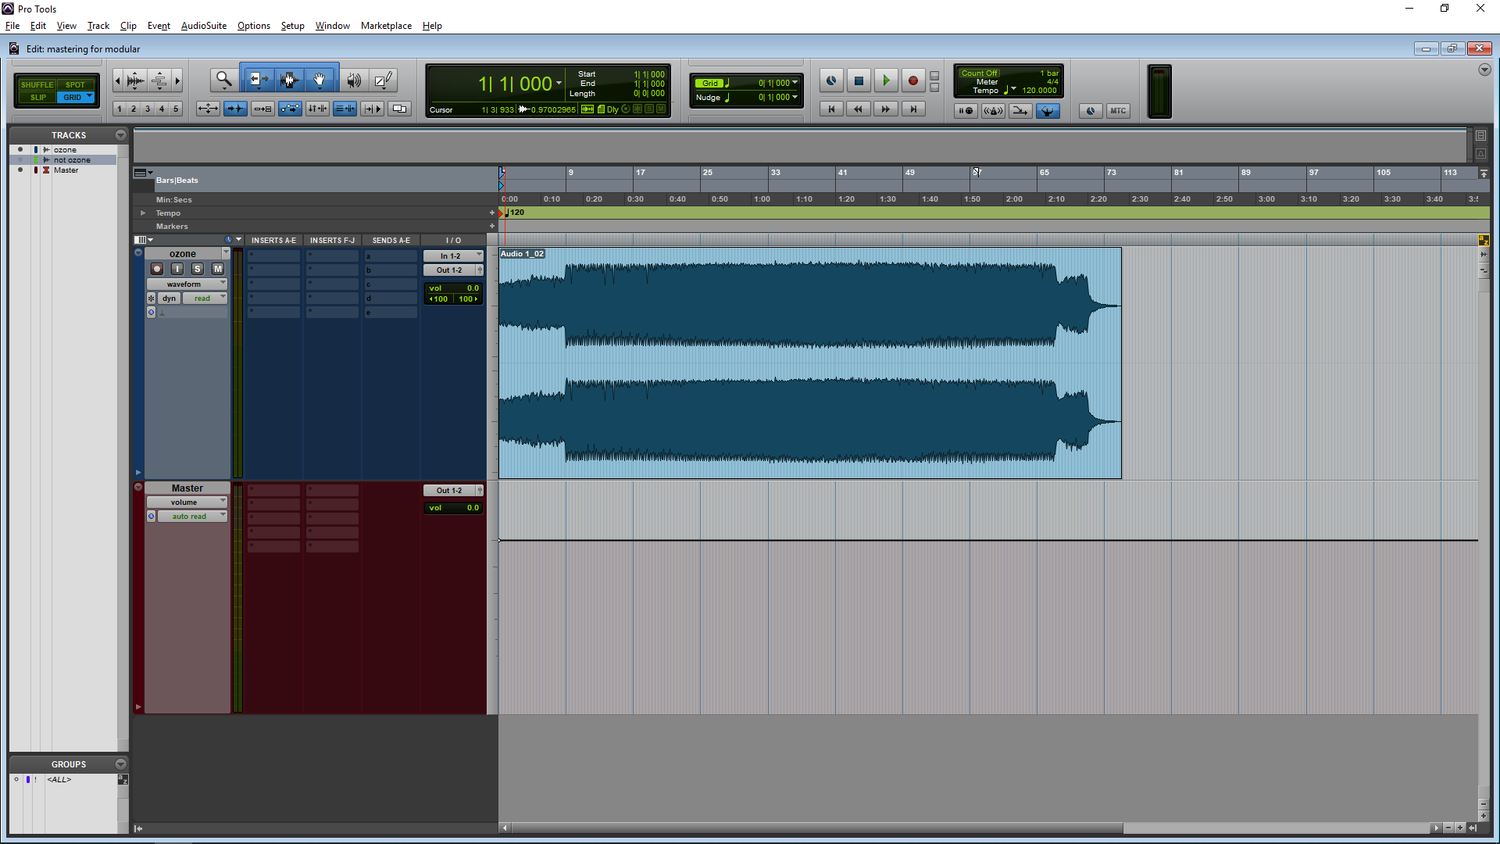
In this example, the patch I’ve recorded is some acid house nonsense and only consists of a few layers: kick and snare from two Basimilus Iteritas Alters, cymbals from Intellijel Plonk, an acid line from Loquelic Iteritas Percido, and some reverb from the Make Noise Erbe-Verb on top. I’ve mixed the percussion through my Erica Synths Drum Mixer and done some EQ and compression on my drums with a Happy Nerding Tritone and a WMD MSCL, and I’m ducking the LIP and the reverb to the kick with another MSCL. Everything is then summed in an Intellijel Mixup (simple and gets the job done) and then goes out to my soundcard and into Pro Tools. As I said, lots of mixing in the rack, and sometimes it would make more sense to do much of that in Pro Tools, but this time I liked how it sounded straight out of the rack. That said, there’s one thing I want to do right off the bat to make sure things are sounding okay: I want to check my noise floor. Most of the modules I’m using here are pretty quiet, and the noise floor of my whole recording system is relatively low, so I’m not too concerned about it being an issue. If it were, I’d put a noise gate on, and tune it to take out as much bad noise as I can without eliminating good stuff or causing sudden cuts. Then, it’s on to the first stage of the mastering process. I’m going to be doing all of this twice in two separate masters: once using Ozone 8 by Izotope, one of the most popular suites of mastering-oriented tools, and once using some of my personal favorite plugins by other companies. Remember, this is about concepts, not specific pieces of equipment, so try it out with the plugins you have at hand. I’ve tried literally hundreds of plugins for this sort of thing and they all do it a little differently and have their own uses, but again, the concepts stay the same.
LET’S MASTER!
So, here we go. Let’s jump right in. It’s not scary, I promise. The water’s fine. I have a clean slate in my session, my full mix on an audio track:
And here’s what that sounds like. I’ll be using this same 20 second clip through the whole blog post to show what changes I make on each step. I’ll only be providing audio of the Ozone chain because they ended up sounding about the same.
Pretty straight forward, nothing too cool. Yet.
And now move on to the first step...
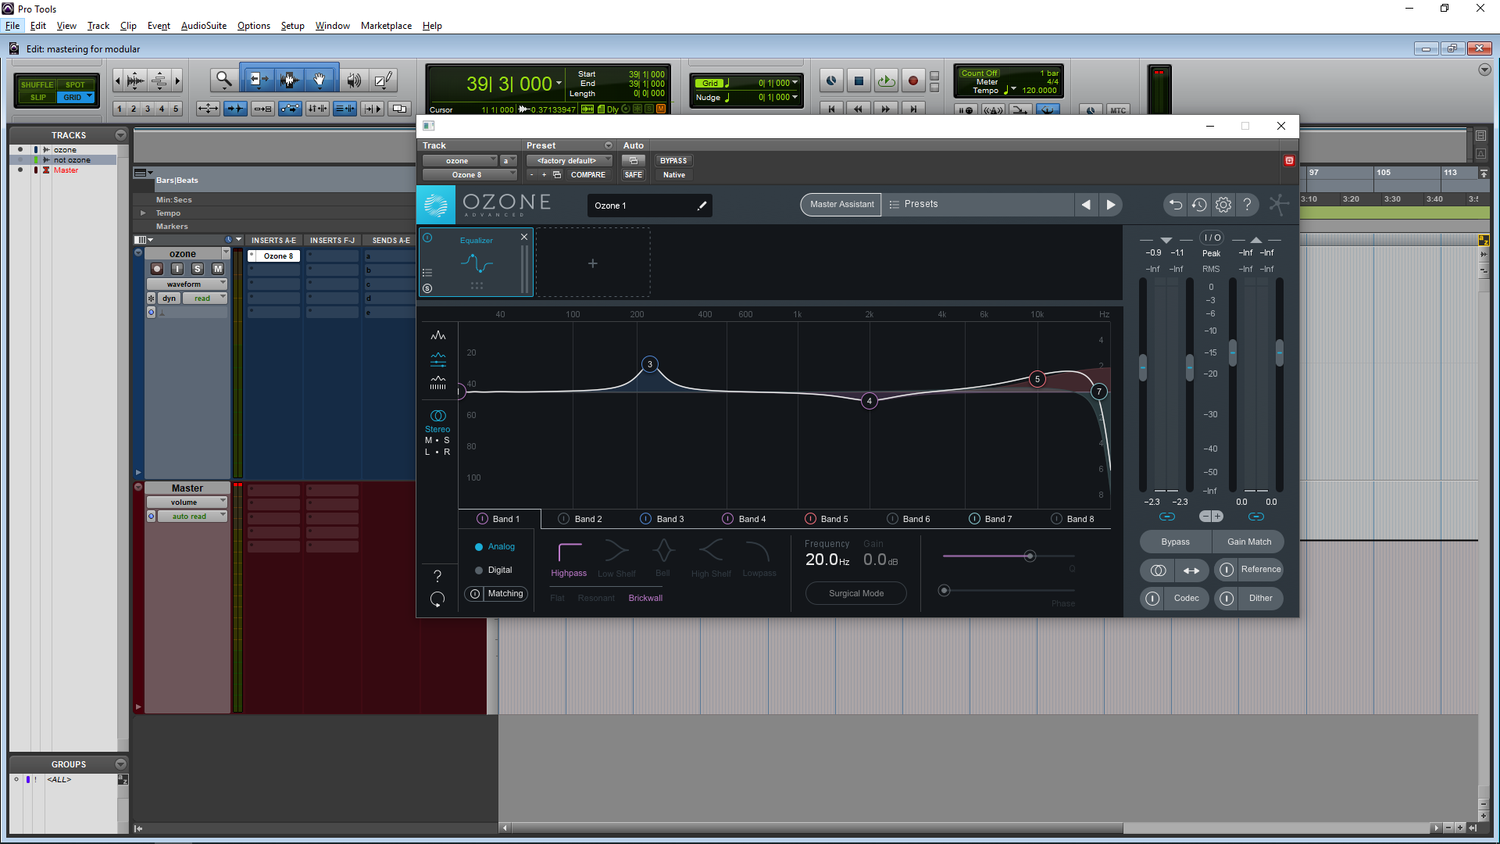
EQUALIZATION
EQ is basically a fancy way of saying “make some frequencies louder and some frequencies quieter.” There are a lot that can be done with equalization, but that being said, there’s two things that I’m going to do here: the creative side, making sure the frequencies I care about are present, and the technical side, making sure my recording won’t damage audio equipment and suck up a ton of headroom (space in the dynamic range) that we’ll want later on. The first thing I’m going to do is a low cut at 20hz and a high cut at 18khz. The cut at 20hz eliminates and subsonic frequencies and DC offsets that we don’t want in our recording. The cut at 18khz basically just takes out frequencies we can’t hear, and therefore don’t care about. If you render your track to an mp3 this will basically happen anyway, so I’d rather do it now and know exactly how my track sounds.
The next thing I’m going to do is a 1 dB high-shelf boost at 10khz. This may seem odd, but it’s a very common technique to make recordings sound “brighter”. This is a creative technique, so try it out and see how it sounds on your patch. I never go below 9khz if I’m doing this because it starts to make things muddy. I also never boost more than 1.5 dB because in general it makes things too sharp. But these are my rules. If it sounds good, ignore them!
Lastly, I have a small boost at 200hz. This is something I would never do because the 200hz range tends to be very full and muddy all ready, but in this one case, there’s not a lot going on, and the fundamental frequency of my snare is around there. I wanted to bring my snare out a tiny bit, so a tiny boost it is.
My kick is feeling a little dead on its decay, and I could try boosting the fundamental, but instead I’m actually going to address this later with a different technique.
There’s a lot more that can be done with equalization, but in this case, this is as much as I need to do.
Here’s the EQ curves I applied in Ozone:
And on the other master outside of Ozone, using my favorite all-around EQ, the McDSP AE600:

Past this point, almost everything I do is going to be because I like how it sounds. Again, mastering is a creative process, and while there are some things you definitely need to do, you should definitely experiment and see what works for your sound.
Here’s what it sounds like:
MULTIBAND DYNAMICS
In my opinion, multiband compression/expansion (the act of splitting an audio signal into separate frequency bands and processing them separately) is overused. I’ve done plenty of mastering tasks without it. However, it can be useful in moderation, and I like how it sounds on this mix. Many people act like it’s a necessity, but I disagree. Again, try it out, and see what sounds right to you!
 In Ozone, I have relatively aggressive compression going on in all bands, with the wet/dry mix at 50% on all bands to give a slightly less snappy sound to everything. It still brings out everything how I want it too and adds some impact to the transients of my percussion, but isn’t incredibly in-your-face. I’ve done the frequency band settings and makeup gain by ear to match what I want the final balance to sound like, kind of like using an EQ.
I’m also going do some mid/side processing to add some width. If you aren’t familiar with the concept, mid/side processing basically separates the mono part of a stereo signal (the mid) and the rest of the stereo information (the side) and lets you process them individually. It’s extremely helpful in mastering to control width without taking up a lot of headroom and keeping your mix mono compatible.
The Ozone multiband dynamics module has a mid/side compression mode, so I’ll go ahead and engage that and do a bit of side multiband compression and add 2dB of makeup gain.

This adds a bit of width and fills out the stereo field nicely. Nothing extreme, but very helpful.

On the not-ozone front, I’m using Pro Multiband Dynamics, my favorite multiband compressor/expander ever. It just sounds great. I use it way too much. In this case, I actually started with a preset instead of the init state as I knew how I wanted it to sound. I did a little bit of adjustment on levels and then called it good.

I then used a free plugin called Voxengo MSED which is a very useful mid/side encoder, decoder, and processor. I’m using it in its most basic form here and adding 2dB of gain to the side. I didn’t feel that further compression was necessary on this one.
That was a long step, but here’s how it sounds now:
HARMONIC EXCITEMENT
This is a really fancy way of saying distortion. This is the last “mixing” type of change I’ll make: remember how earlier I said I wanted to bring out the kick drum? Here’s where I’m going to do it. Using multiband distortion, I’m going to saturate the sub-100hz range relatively heavily to bring out the second harmonic of the subby kick drum.
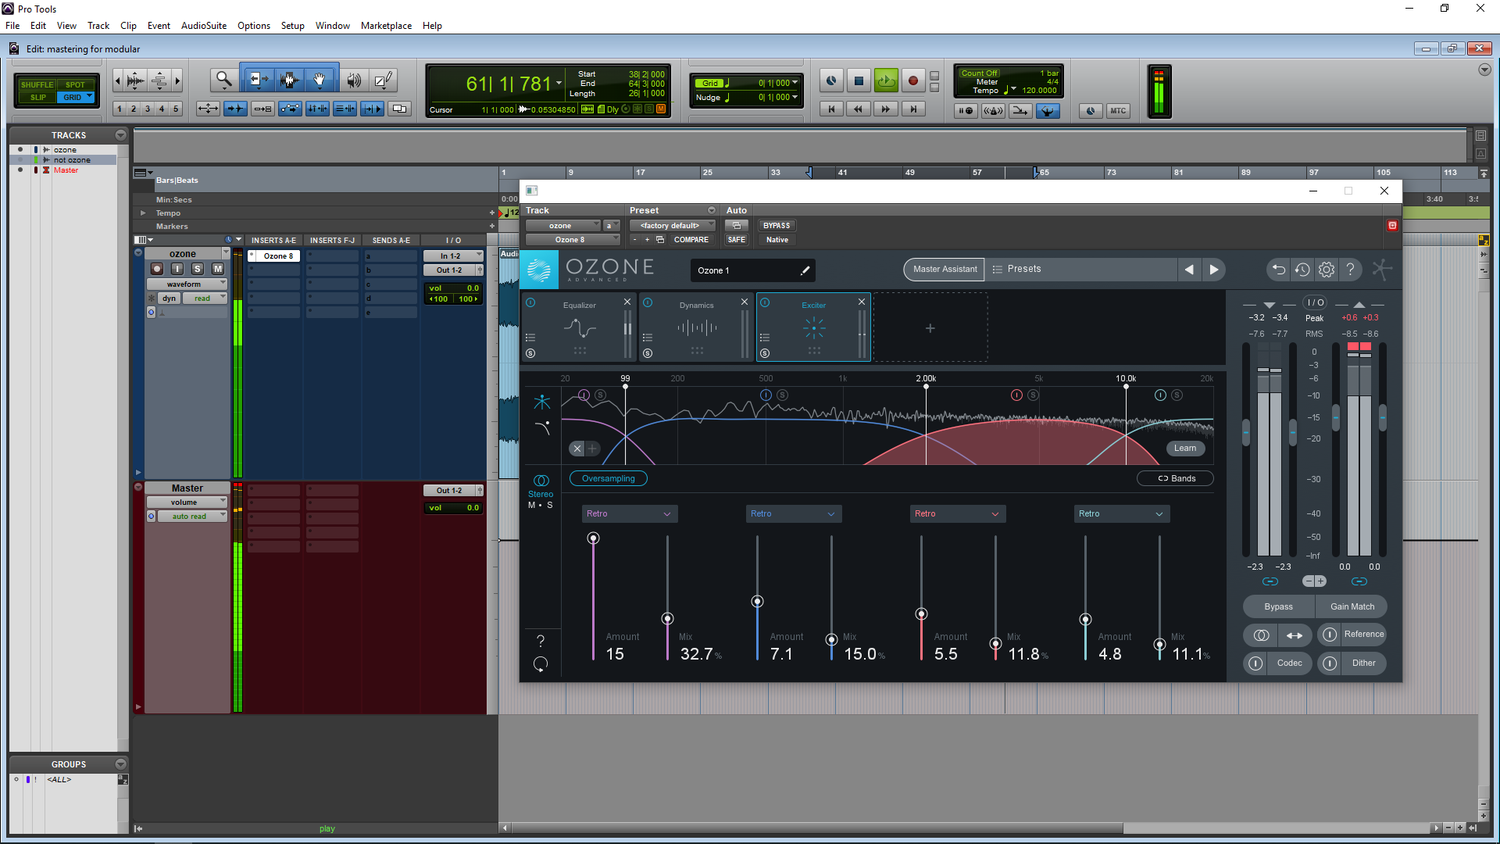
I found these settings worked nicely in Ozone, and I also gently saturated the rest of the frequency band as well. Ozone has a few harmonic excitement modules, so try them all out and get a feel for what they do and don’t do.

On the not-Ozone master, I actually did two stages of harmonic excitement: one multiband in Trash 2, again bringing out the 2nd harmonic of the kick, and one full-range using JST Clip. Both of these are fantastic, albeit very different distortion and saturation plugins. Again, doing a lot of small things is what really matters in mastering.
This is probably my favorite part of mastering, so I always have to be careful about not going overboard. Here’s what I ended up with:
STEREO MANAGEMENT
You can skip this step if your recording is mono.
However, I almost always work in stereo, and this is especially important for things that are club-oriented, so have a look.
What I’m going to do here is sum my low end (I like sub-250hz) to mono. This does two things: first, it makes my subs super, super impactful (mono feels louder), and also makes sure I don’t have any low-end phasing issues on a big system. Most club sound systems are wired in mono anyway, and this helps deal with that early on in the mastering process.
Ozone is really good for stereo management. I’ve summed my low end to mono and added a tiny bit of width on some of the other bands as well, just for character:

I really prefer this stereo manager, even when I’m using other plugins, but there are alternatives. I’ll use Air Stereo Width on the non-ozone session:

This is a relatively subtle one, so here’s how it sounds:
TIME TO SQUISH
Here’s the scary step: bringing it up to volume. There are enough discussions and arguments about compression and limiting that reading through them all would take several lifetimes, but here’s how I like to do mine. But first, a discussion about how “volume” works.
All tracks peak at 0dB. So how do some seem much, much louder than others? That’s where peak vs. RMS comes in. Peak loudness is literally how loud something is. If all the elements of your track are sitting at -10dB but your snare transient is smacking you in the nose at -1dB that’s how loud the peak volume is. However, in a lot of cases, a more useful volume measure is RMS, or root mean square. RMS is kind of like the average volume of audio taken over about a third of a second, which is more like how we actually perceive sound. There are a lot of other scales that can be used to measure loudness and dynamic range like K-System and LUFs, but I find that peak and RMS serves me just fine, and I’m very used to it which is helpful as well.
I aim for a very loud -5 RMS or above for this sort of music. Again, this is my preference, and you should listen to your favorite tracks, see how hard they’re hitting, and aim for that. This is a very useful time to drop in some of your favorite tracks in a similar genre and compare your master to them. If some parts of the frequency band are sounding too loud, make tiny EQ and multiband compression adjustments until things are sitting nicely. Also remember that low end absolutely eats headroom, so consider shaving off a few .1dB’s from the sub if you want to make it even louder. Yes, that small of a change makes a difference. Weird, I know.
I like to use two limiters: one relatively gentle limiter that does a preliminary compression and perceived volume boost, and one that actually squishes the track into the final form that I want it to be.
Ozone has two limiters, which is great. I like them both, and use the maximizer as the final limiter on 95% of my masters. First, though, I’m going to start with the Vintage Limiter module.

I’m doing mild limiting, with a reasonably long release time. Again, this isn’t the stage where I want to go for maximum loudness, this just does some preliminary dynamic reduction to reduce how much compression is done by any one device.
Here’s how it sounds after the first round of limiting:
After this, I’ll engage the maximizer.

There’s a bunch of important notes to make here. First, there are a lot of different limiting modes in Ozone (as are there in most mastering limiters). They all sound different, so see what works best for your mix. In this master I found that IRC IV in Transient mode did what I wanted best.
Next, I have a low release time: this means the limiter is working faster, which makes things louder. Bring the release time down too far and you risk distorting your signal via waveshaping. This is around where I usually end up, but I’ll go longer or shorter depending.
I’ve also engaged peak limiting and brought the maximum volume down to .5dB. This is because low-quality audio compression formats like mp3 and low-quality players like Soundcloud and Instagram encode audio really badly. Even if your mix is peaking at 0dB in the session, an effect called intersample peaking can occur when the audio is compressed into mp3 or the like and the audio will clip, even though on paper it’s below where that should happen. Cutting off .5dB generally avoids this issue, although I sometimes have to go lower. Ozone also has encoder simulation tools that allow you to check for this sort of problem beforehand.
Here’s what it sounds like after that final round of limiting:
On the non-Ozone session, I’m also using two limiters: the Sonnox Oxford Limiter and the McDSP ML4000.

I’m actually doing a bit more compression with the Oxford Limiter in this case, even though it comes first. I really like how it sounds, so I’ve done quite a bit of compression with it and then sent it through the ML4000 as a final limiter. Again, the ML4000 has multiple modes so I’ve found the one that I like best.
MAKING SURE IT LOOKS GOOD
Sometimes our ears deceive us. It can also be helpful in general to see what’s going on that we may not be hearing. I like using spectral analysis software to take a look at what’s happening in my master.

Here I’m using Izotope Insight. I only have two of the modules visible here because I’m most focussed on frequency spectrum than anything else. I have a dip in my mids and my highs look a little strong so I’ll take a look at addressing that (both in terms of how it sounds to me and how it looks on the spectrum analysis) before I call the master done.
SOMETIMES NOISE IS A GOOD THING
Now we’re at the final step. Everything is sounding great, we’re liking our levels, it’s nice and loud, and we’re ready to export. The final step is something called dithering. Dithering adds noise. Why would we add noise to a nice clean master? We’re dealing with digital audio here, and because of that there are some artifacts that are unavoidable. Dithering basically reduces the amount of quantization noise present in digital audio. It’s weird, it’s hard to understand, and a whole article could be written just about dithering, but for now, know that it’s a good thing to do on a final bounce. Ozone has dithering built in:

16/44.1 is the standard bit depth and sample rate for CD audio (and most audio you’ll run into these days) so make sure to set the dither to 16 bit.
Outside of ozone, there are lots of dither plugins, including this one built into Pro Tools. It’s pretty straight forward:

Either way, unless you’re in a professional mastering studio, it probably won’t make a huge difference to your ears, but again, experiment a bit.
TIME TO RENDER
All that’s left to do now is to render out the final master and send it out for the world to enjoy. Obviously, there’s a lot to learn about mastering, and this was just an introduction. But just like any other skill, anybody can learn to do it. For something like an Instagram clip I can do a “master” in about 10 minutes. It makes things sound much, much more impactful and helps you stand out in quality (and just plain loudness). This same process is also relatively near what I use when I master full tracks outside of the modular realm so these concepts can be applied virtually anywhere. Again, it’s a creative task as much as a technical one and is very genre and style dependent so experiment and practice and you’ll be off to the extremely loud races.
Here’s the final render of that clip. I encourage you to go back to the beginning and compare this to what we started with, as the change is striking, and shows how much can be achieved with mastering.